Whether you are an avid hunter or simply want to keep tabs on the people and/or animals that might be passing by, trail cameras are an invaluable asset. This beginner’s tutorial will show you how to set up a trail camera, and we will also provide you with some helpful tips and tricks regarding choosing the right model and proper maintenance.
How to Set Up a Trail Camera
Step 1: Remove all items from the box and verify that nothing is missing. The package should contain an inventory list, and be sure to update your camera’s firmware before deploying it.
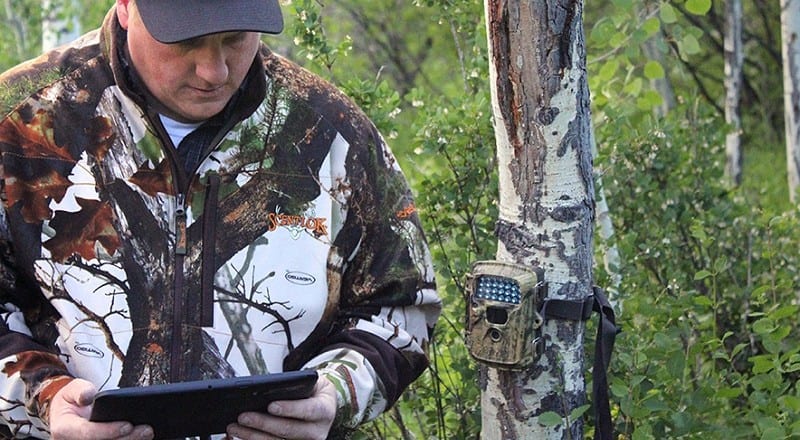
Step 2: Determine the best location for placing your trail camera based on what you’re hoping or expecting to capture on film. Many experts recommend scouting locations using a combination of your personal knowledge of the area and Google Maps. Try to place your camera off the beaten path and facing towards the trail for a better chance of capturing more usable photos.
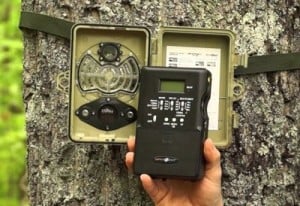
Step 3: Install the trail camera’s batteries when charged, and ensure that the SD (memory) card is also installed. If you forget to install the memory card, all your work will be for nothing and you’ll have to wait even longer to see results. This is also a good time to make sure the trigger speed, trigger frequency, timer and flash settings are configured to your liking. If possible, use a combination of time lapse mode and trail mode to give you a better idea of what’s happening in the area.
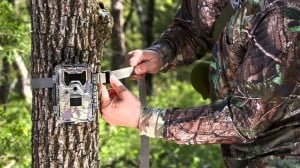
 Step 4: Mount your trail camera. There are various ways to mount a trail camera. Some individuals wrap bungee cords around the camera and the tree. Other individuals make use of tutorials found online to build their own mounts, as you can buy the necessary parts from your local hardware store for just a couple of dollars. If you are mechanically inclined then this may be your best option. You can also buy trail camera mounts online. Whatever method you choose, the important thing is to make sure the camera is secure and has a clear shot of the field of vision you desire.
If you decide to conceal the camera with brush or other material, be sure to keep the lens clear. It’s also recommended to mount your camera facing either north or south to avoid overexposure and image washout. Lastly, mount your camera slightly higher than eye level and consider purchasing a secure box to protect your camera from would-be thieves, bears, and other entities that have been known to wreak havoc on these devices. You might also want to ask your insurance agent if your trail cameras can be covered with the rest of your valuable hunting equipment.
Step 5: Test your trail camera by activating it yourself. It’s best to do this during the day and at night, using a variety of settings. Log the time each photo was taken and which settings were activated, and then have a look at what’s stored on the SD card to make sure that everything adds up. Before you leave the area, use scent eliminator on and around the camera. You might also want to create some rubs and scrapes to attract deer to the area.
At this point, you should have a properly configured, mounted, and functioning trail camera. To get the most out of your investment over the long haul, you’ll need to know how to manage, monitor and maintain your trail camera.
Trail Camera Management, Monitoring and Maintenance
- Properly managing your trail camera can mean the difference between success and failure in your endeavors. Many trail camera companies update the firmware of their devices regularly to patch software “bugs” and you’ll want to download those updates as soon as possible to prevent photography or memory issues. You should also make a log of what was seen at what time, and this is especially important for hunters with multiple cameras. This will allow you to learn the movement and habits of the animals in the area. Number each camera and SD card to make it easier to keep track of what’s happening where. Do NOT try to rely on your own memory because it can be very easy to get confused if nothing is written down. You’ll also want to record the exact GPS coordinates of each camera, and if you relocate your cameras document all of the current and past locations you used.
 When it comes to hunting, it pays to be methodical in your documentation of which animals you see. Your trail cameras will allow you to begin the hunt from afar by tracking the movement of specific bucks (or any animal you’re after). If you’re using time lapse mode, you can figure out the path of an individual and plan your hunt accordingly.
- For hunters with multiple cameras, consider having multiple SD cards for each camera. This way, you can switch the cards out and take the one with photos home to organize the photos. To save space and time, you can delete photos if they don’t show you anything useful or if they contain images of animals you don’t plan to track.
- You’ll be visiting your camera from time to time, so take scent remover with you when you go. Spray the camera (but not the lens) and then wipe the camera dry with a clean cloth. Always use neoprene gloves when handling your camera as they can help to prevent animals from picking up your scent. If possible, check your cameras on rainy days as rain is a natural odor neutralizer and eliminator. Check your batteries and flash regularly so you never have any camera downtime.
By following these tips, you can expect your trail camera to last a long time and provide you with valuable insight into what’s happening in the area.
Conclusion
You’re all set! You should now be able to take the knowledge you’ve gained from this tutorial and use it to successfully set up a trail camera and keep it working for you for a long time. If you have any further questions, or if you’d like to submit a tip that has helped you with your trail camera setup and care, we’d love to hear from you. Happy hunting!

Kenneth Ashworth says
Pls write a post : how to using camera on season
David says
I have an 2017 Ancheer wildlife camera. I cannot figure out how to set the timer so the camera records for the same time frame day after day. Any suggestions on how to program the camera for daily recording for a specific time frame? Of course, the owners manual is very vague and does not provide good setup instructions.
Lester Tobias says
I’ve bought 2 trail cameras Mdl HC-801A and the manual is not explanatory for setting the cameras up. IS there any kind person that can gmail me to explain how to set them up. Lester Tobias @ laddtobias@gmail.com. I would greatly appreciate it thank you!
Lester Tobias says
I’ve bought 2 trail cameras Mdl HC-801A and the manual is not explanatory for setting the cameras up. IS there any kind person that can gmail me to explain how to set them up. Lester Tobias @ laddtobias@gmail.com. I would greatly appreciate it thank you!
normaphillips says
I have a campak hunting trail camera. I lost the manual. I am not sure how to set it for taking pictures. can you walk me through the the steps?
Elizabeth Chalfant says
I have the M-40, takes great pictures BUT not consistently………5/6 pictures and shuts off…………….and y our setting instructions leave a lot to be desired.
HELP HELP HELP
I have the M-40, MOdel MCG 13181 and have never gotten it to work well. LOVE the pictures when I happen to get it right and then never again………………
I have suffered with this camera for months not working and finally looked at comments and found comment notes to say, set aim, then quick start……………..started doing that and worked for a couple nights. Question, do i need to turn the camera off to remove the current card and install new,,,OR can I just replace card and go on?
SO, step by step to set up,,,,,,,,,,,,,,,,1. turn to aim? 2. then what? 3. then what?, 4 set to quick start…………and made the mistake of putting a security code on and have to access camera each time with that, any way to disable that? HELP HELP
Elizabeth Chalfant says
HELP HELP HELP
I have the M-40, MOdel MCG 13181 and have never gotten it to work well. LOVE the pictures when I happen to get it right and then never again………………
I have suffered with this camera for months not working and finally looked at comments and found comment notes to say, set aim, then quick start……………..started doing that and worked for a couple nights. Question, do i need to turn the camera off to remove the current card and install new,,,OR can I just replace card and go on?
SO, step by step to set up,,,,,,,,,,,,,,,,1. turn to aim? 2. then what? 3. then what?, 4 set to quick start…………and made the mistake of putting a security code on and have to access camera each time with that, any way to disable that? HELP HELP